
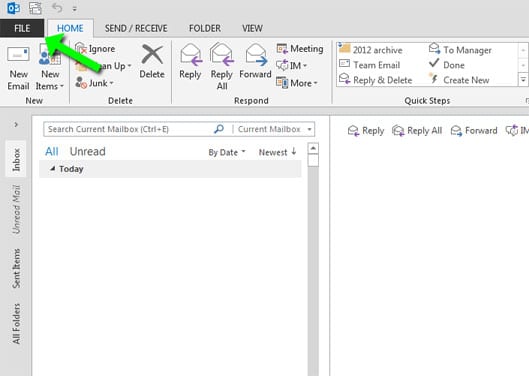
- 1. Click on the “FILE” menu.
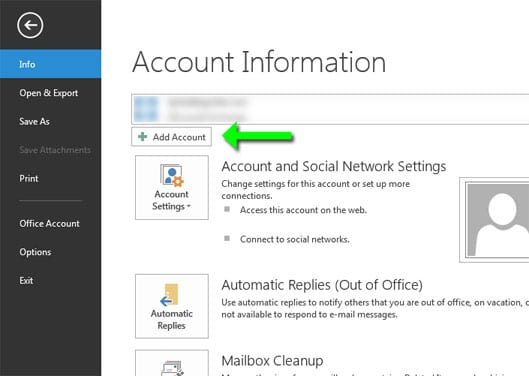
- 2. Click on the “Add Account” button.
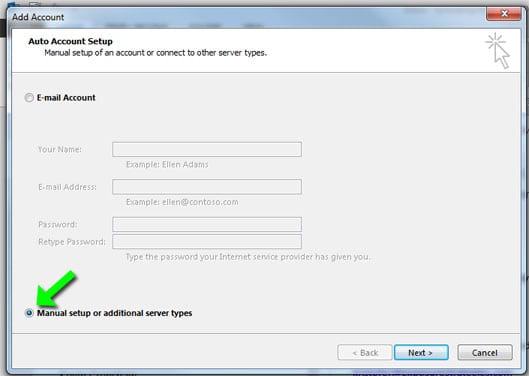
- 3. Check the radio box for “Manual setup or additional server types” then click the “Next >” button.
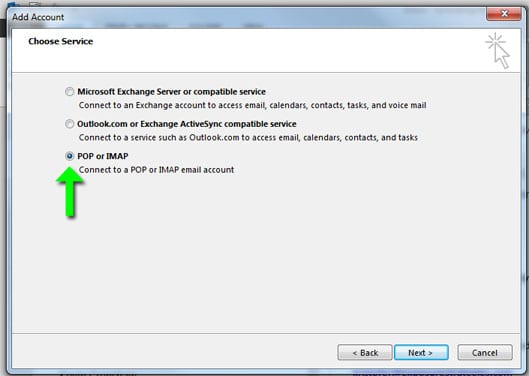
- 4. Check the radio box for “POP or IMAP” then click the “Next >” button.
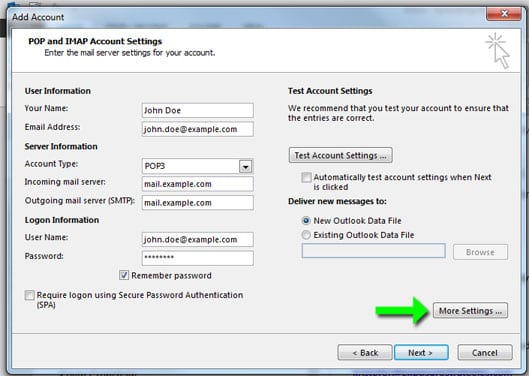
- 5. Fill out all the fields on this screen.
Your Name: The name people will see when they receive an email from you
Email Address:Your full email address
Account Type:Leave as POP3
Incoming mail server:This will be ‘mail.’ plus your domain name
Outgoing mail server (SMTP):This will be ‘mail.’ plus your domain name
User Name:Your full email address again
Password:The password for your email accountAlso uncheck the box for “Automatically test account settings when Next is clicked” then click on the “More Settings…” button.
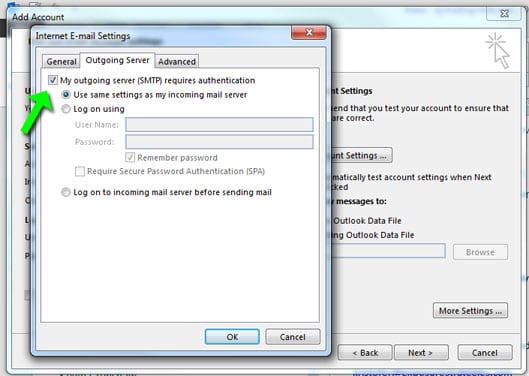
- 6. Click on the “Outgoing Server” tab, then check the box for “My outgoing server (SMTP) requires authentication” and leave the other options on the screen as they are then click the “OK” button.
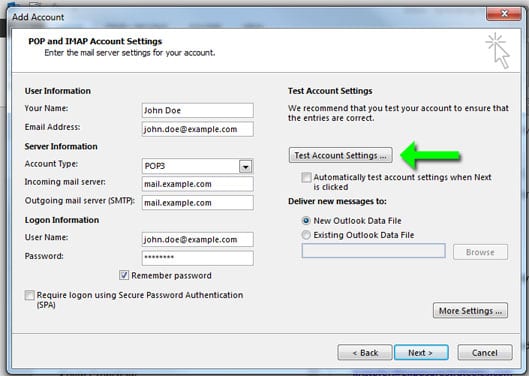
- 7. Click the “Test Account Settings…” button
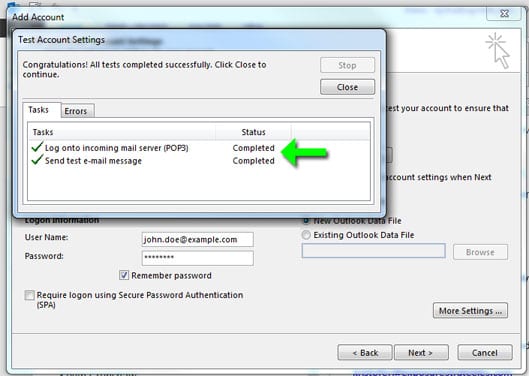
- 8. If both Tasks are listed as Completed then the account is successfully setup! Otherwise go back and check all your settings. Click the “Close” button.
- 9. Click the “Next >” button then the “Finish” button.
E-Mail- Setup Outlook 2013 for POP Accountwebuadmin2024-09-12T14:15:24+00:00